These deco mesh wreaths may look intimidating but I promise you once you get the feel of working with the mesh you can make the wreath of your dreams. The sizes, colors and supplies are endless in today’s decorating world.
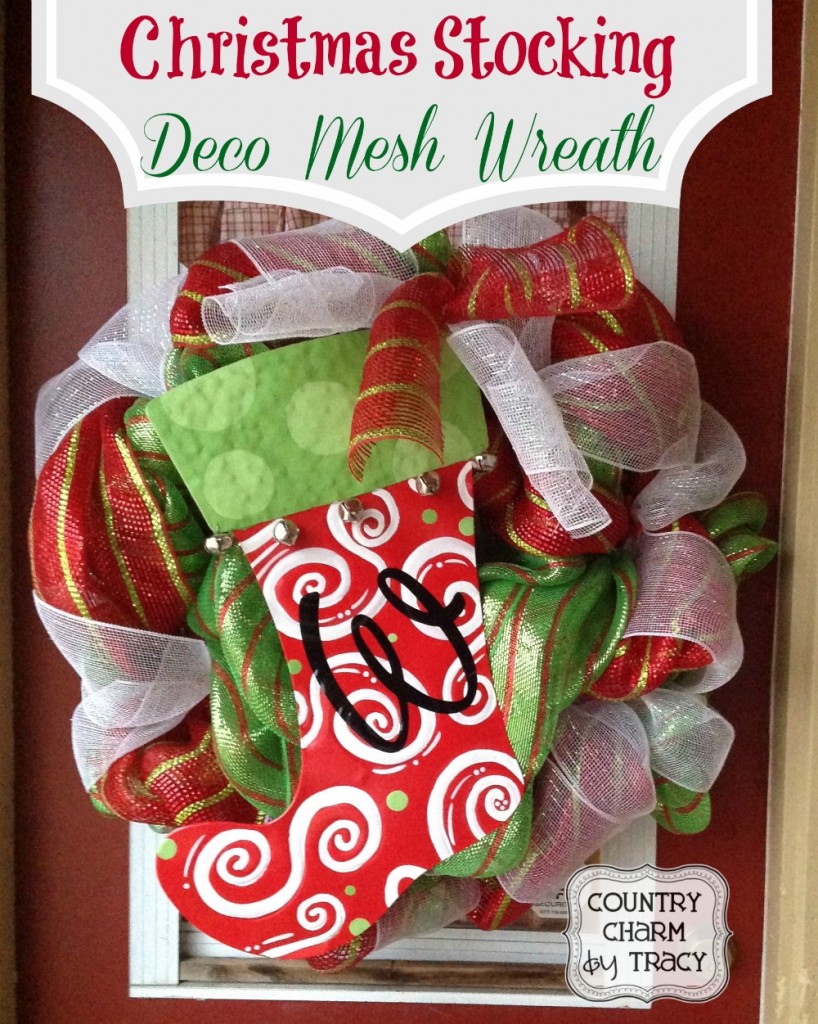
 This project started when I found this adorable metal painted Christmas stocking at a craft show. It is painted just like the one you see in the picture except I added the W to personalize it for my family. The stocking is very lightweight and oh so cute. I’ve been wanting to create a Christmas deco mesh wreath for my door but was waiting to find the right colors and time. Finding this stocking was my inspiration for colors.
I just love how it turned out.
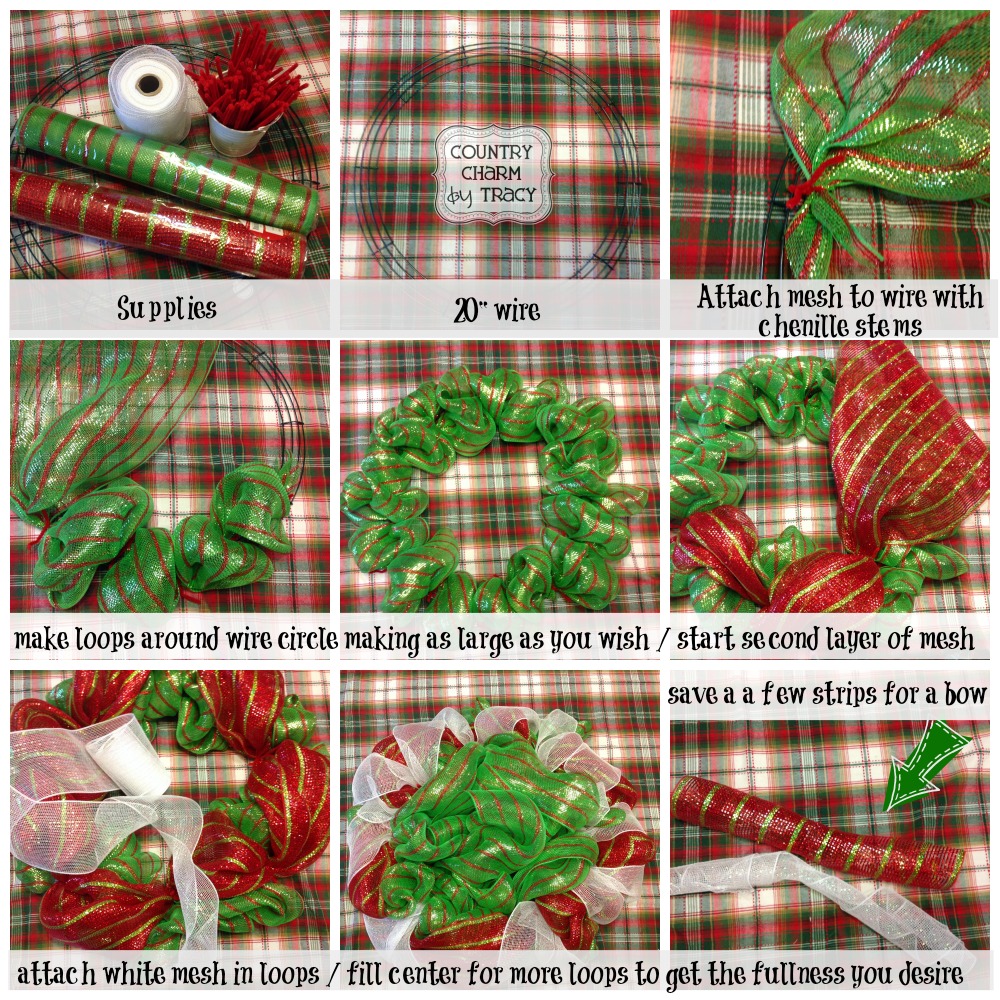
If you would like to know how I created this wreath see here is a quick over view.
A couple of tips:
– I wanted my wreath really full so I used 2 green rolls of mesh, 1 red and 1 white to fill this 20″ wire. I purchased this mesh at Wal-Mart for $7.98 each roll (except the white) so it can be a little pricey. Watch for the mesh on sale at Hobby Lobby to make it more affordable. The nearest HL store is 45 minutes away so I weighed the price vs. gas and Wal-Mart served my crafty project purpose.
– Cut the chenille stems in 1/2, place them near by in a bucket or jar to grab them when working.
– The wreath can be made as full as you would like. Add various ornaments, other ribbons, decor items, etc.
– Save a few strips of mesh ribbon for a bow. I love to add this as a finishing touch to my element.
– This project took me about 1 1/2 hours to complete from start to finish. I am not a fast crafter as I like to “fiddle” and “piddle” as I go along.
– To cut out the “W” I used my Cricut die cutting machine and vinyl. Works perfectly.
(Lyrical Letters for the “W”)
~Tracy
Linking to some of these Linky Parties this week!
Related Posts
Make sure and follow me on YouTube, Facebook, Instagram and Pinterest for more Crafty Ideas!!


So cute and poofy!
Thanks Steph 🙂