I am a girl of convenience. I drive my husband and kids crazy but it’s me. I love things at my fingertips, I love to have my desk and drawers in a way that I can easily find and do things. I am not saying it is the most organized but I’m an out of sight out of mind type of girl. This leads to my hoarding of “stuff” I suppose. 🙂
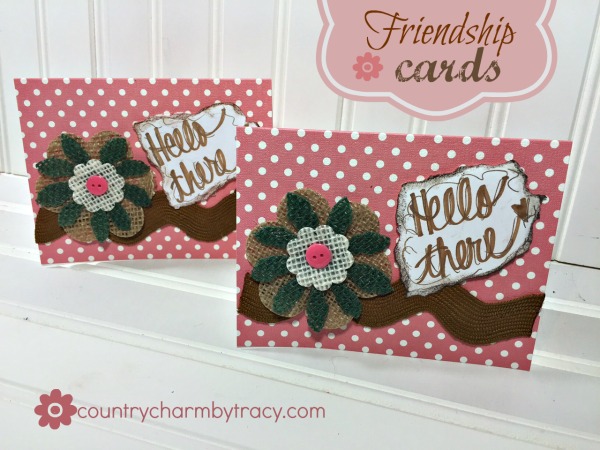
I put these sweet friendship cards together in a matter of minutes. I think the thing that took the longest was figuring out what I wanted to write for the sentiment.
My life became so much simpler when I picked up a box of these cards from Hobby Lobby. You can get the whole box on sale for $4.99 when HL runs their 50% off sale (regularly prices $9.99). Or use the 40% off coupon when not on sale. They come in a variety of colors, patterns and themes so just check what your store has to offer. OR you can shop from the convenience of your home from http://shop.hobbylobby.com
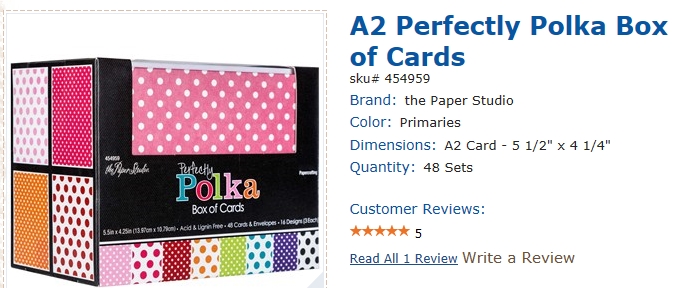
*note* I am not affiliated with Hobby Lobby – they are not paying me to say this – I just love their stuff. I love their store, what I can get there and it feeds my addiction to craft supplies and home decor. Now that they offer online shipping I love them even more. My nearest HL store is 45 minutes away so shopping online balances out my gas if I would make the trip. Plus I can get the sales just like if I would shop in the store. If it’s 50% off in the store that week, then you get the same 50% off online. Works for me!
I know I know I know that most papercrafters make their own card bases by cutting cardstock to the size wanted, scoring and folding to make an A2 size card. Then cut scrapbook paper to size and adhere on top to make the face of the card. Well, when I am in a hurry I don’t have time for that. I need to grab and go.
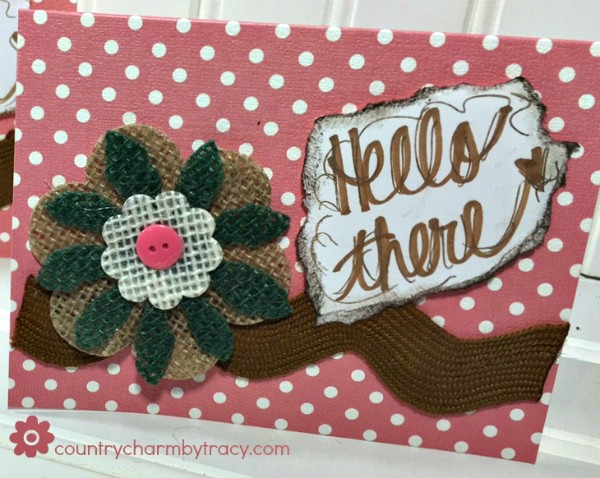
Here is what I did:
– For the base I started with the polka dot A2 size card.
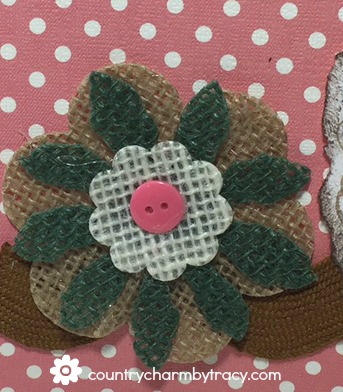
– the bulap flowers were made using the technique I showed you in this post .
– I hand wrote the Hello There using my copic markers and brown glittery gel pen. I just tore the paper around the sentiment to give it the jagged edge. I then shaded the paper with brown ink. I used two pop dots to give a little height and dimension.
– the thick ric rack was also found at Hobby Lobby.
Easy peasy!
~ Tracy
Click here for other card ideas
Related Posts
Make sure and follow me on YouTube, Facebook, Instagram and Pinterest for more Crafty Ideas!!
