Hello everyone!
Happy 2 (yes, TWO) days before Christmas 2014!
I wanted to share a “gift in itself” idea that I created for a couple of my nephews for Christmas gifts this year.
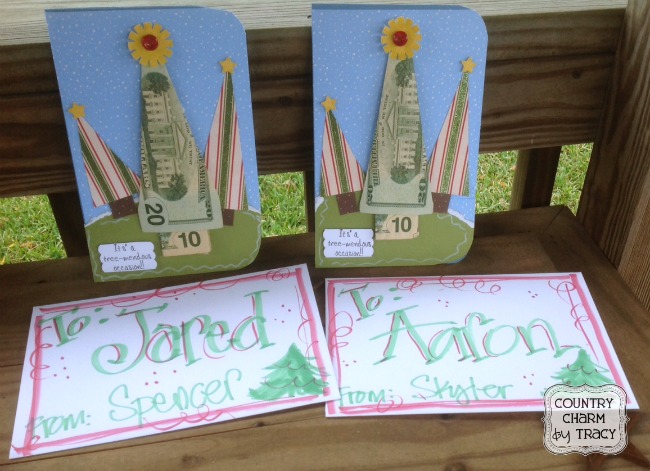
My husband’s side of the family draws names for the grandkids to exchange gifts and all of them are teen-agers (except Spencer who is 8). We celebrated this past week-end and I wanted to share the card idea I created for two of my nephews.
Teen-agers are not the easiest to buy for (for me at least) so when my nephews said they wanted cold hard cash, I was o.k.a.y. with that idea. Easy enough for me and I don’t have to ponder on what, where and how to get something they may or may not like.
Cash is always a good idea so they can get what they want.
Anyone can put $$ inside a card but that’s not how Aunt Tracy “rolls”. 🙂
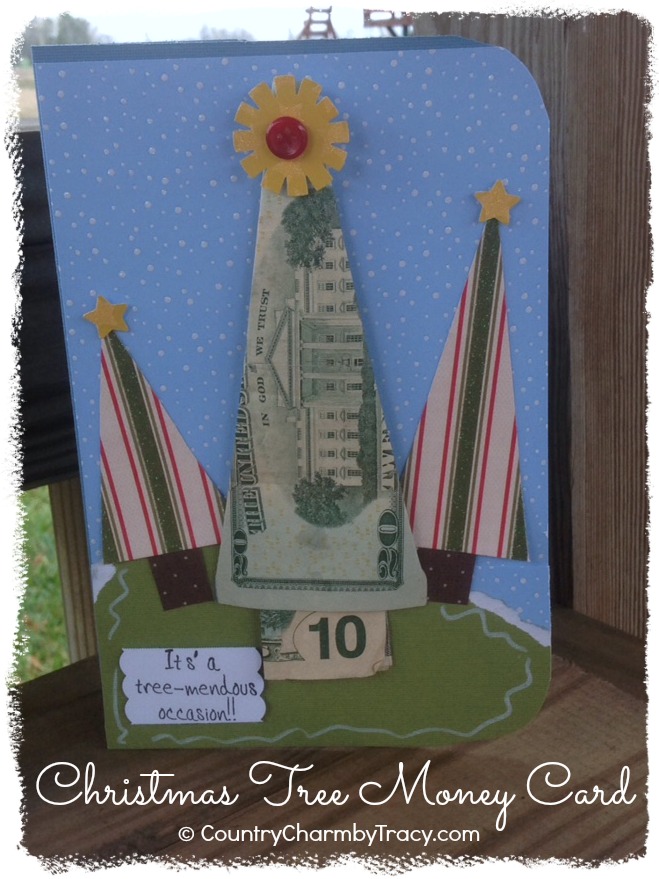
I started with an 8 1/2 by 11 sheet of blue cardstock folded in half portrait style.
The embossed white flaked scrapbook paper is from a paper stack that I had. I thought is was a great background to make a snowy background.
It would be easy enough to create by using an embossing folder through your Cuttlebug machine and highlight the raised areas with a white ink sponge or pad. Or you could use a white gel marker or galaxy marker to make dots all over a blue background.
The green part is Coredinations cardstock which I tore/ripped one side revealing the white core to make it look like a mound for my trees.
The two sides trees were created cutting a strip of pattern paper and angling the middle of the strip with one edge and using my trimmer to make the triangle (angles) for both sides of the tree. The bottom of the trees is a square of brown dotted paper.
Easy peasy!
The star for the two trees is a small star hole punch.
The middle of the tree was using two bills that I folded in the shape of a Christmas tree.
I used pop dots to “temporarily” hold them in place. Nothing permanent so he could remove them later.
I was in a hurry and didn’t have a large star punch to make the top of the larger trees. I settled with a different punch I had in my stash that I thought would work fine and added a small red button to the middle of the star. Works for me!
It’s a tree-mendous occasion stamp is from My Pink Stamper.com
Well, that’s my cards and here is a picture of the envelopes I doodled up to put the cards in.
If you have any questions or need something clarified please contact my via email or through my facebook fan page.
Hugs to all!!
This post was first seen on Country Charm by Tracy
Here are a few other ideas you may like:
Related Posts
Make sure and follow me on YouTube, Facebook, Instagram and Pinterest for more Crafty Ideas!!




That looks fabulous!!! Great job!
Hugs,
Robyn
Thank you Robyn 🙂
Beautiful and practical. That’s how you roll
Thanks Mary — you know me so well. 🙂